
Known for MYSTERY and WISDOM, the beauty of an owl is a whimsical way to start off my Halloween makeup season! So the Owl Queen I will become!
Let's get started, shOWL we? (Ha, snort)


I started by airbrushing my face white (you could also use water activated face paint) but leaving the eye area alone.

Then added white to my neck with face paint.


Prime above and below eyelids with whatever eye primer you prefer. This will help to make sure that any makeup around the eye area won't crease.


Using the NYX jumbo eyeshadow pencil in Black Bean and a brush(AND BEING VEEEERY GENTLE, yes I am screaming this out loud!), draw in the eye shape you would like and then fill in and smudge so that the entire shape is filled in.

Using a little cleansing water or oil free makeup remover wipe away a small area underneath the eye.

Pat gently over the entire new eye shape with a very pigmented black eyeshadow! And no they are not all created equally! Just saying!


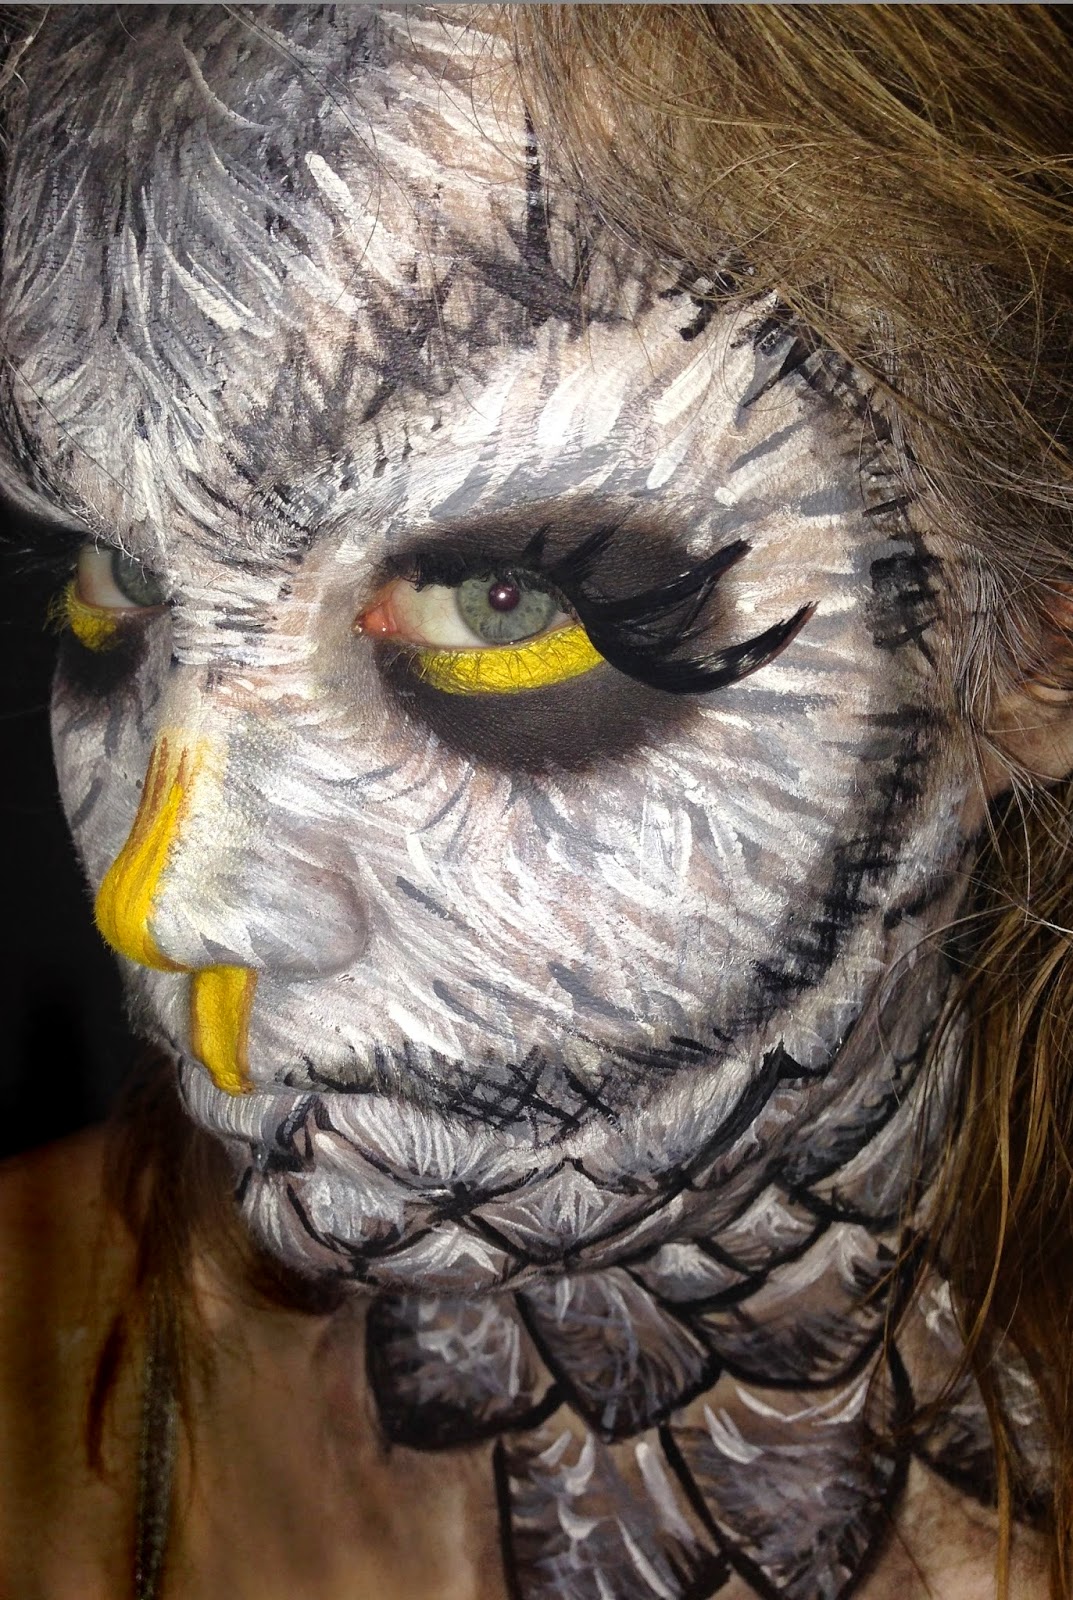
Going in with a gray shadow, fill in your outlines. Owls tend to have a very large round mass of feathers bordering their eyes and many owls have "ear tufts" that come up from the center of the forehead forming an ear like shape. Google pictures, do what you like, it doesn't matter. It's makeup. Just make it YOU.

Do you like my little mustache?

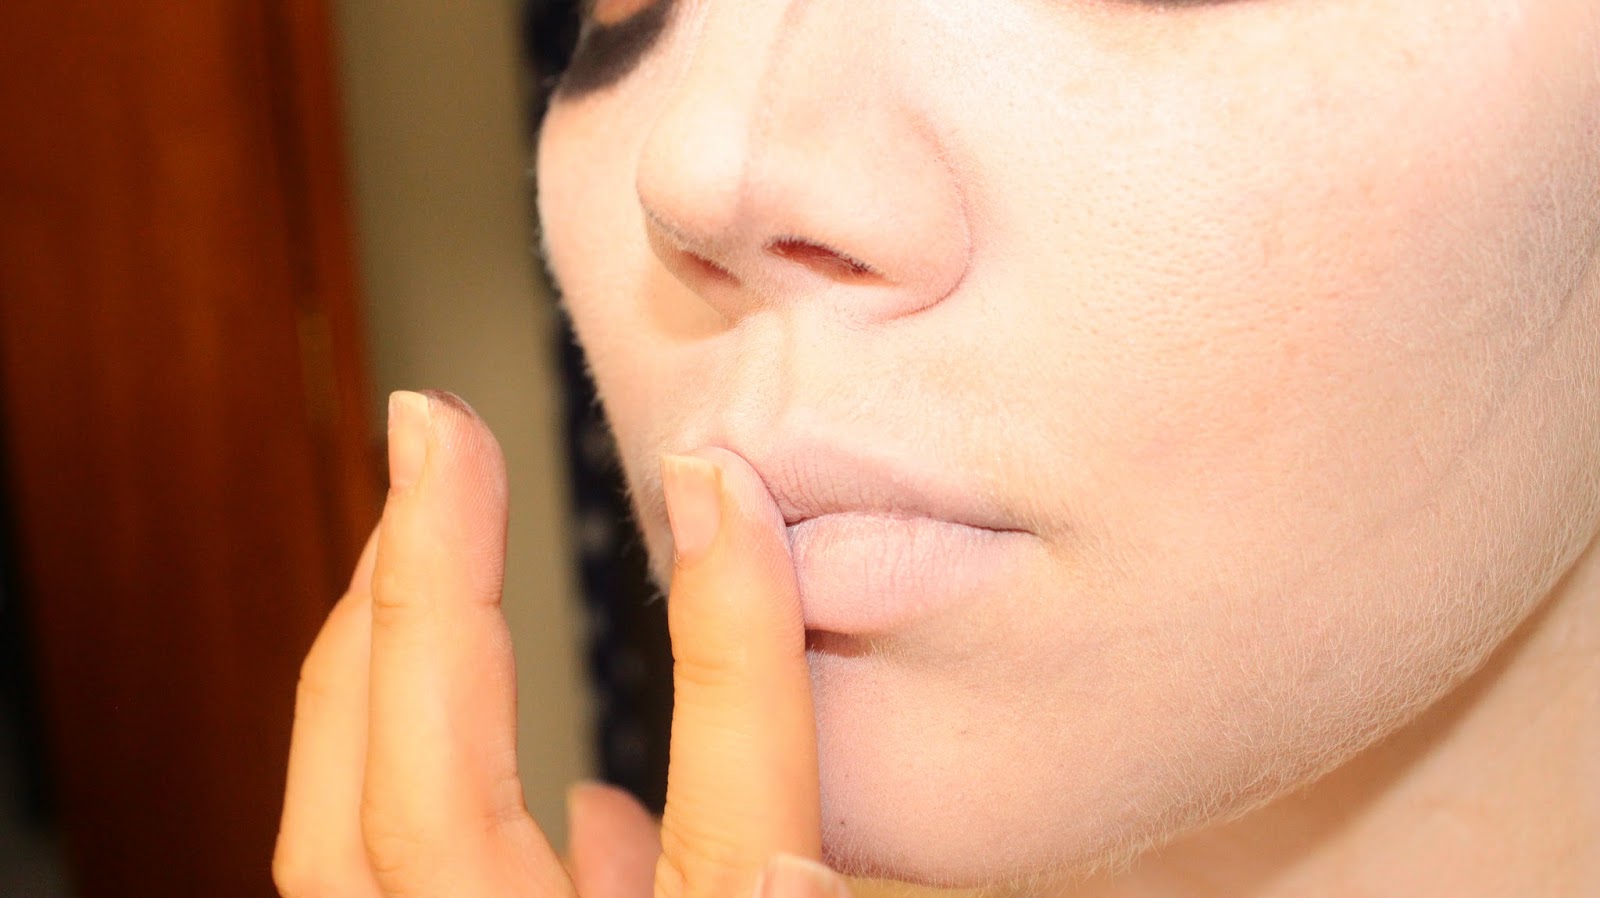
Fill in the lips with a white pencil and press a white eyeshadow over them as well.
Now a key to this next step is 100% the brush! You will need a FAN BRUSH. They are pretty inexpensive and you can get them at any craft store! They are the bombdiggitty at creating fur and feather like texture.


Using a mix of black, white, and gray face paints, lightly flick the fan brush outlining the areas you drew in. And LAYER, LAYER, LAYER! I can't stress that enough! It will probably look like a hot mess at first but just keep layering. I kept the darkest colors on the outside edges and then filled in the center with only gray and white.

Paint in a beak shape with yellows and browns.


Remember when I talked about layering... Ha I'm sure you get the point. Using some finer detail brushes begin to add bolder details. Black hash marks on the outer edges and really stress the white in the center.

And my computer decided to lose a few photos... but all you missed was painting that little gap left open yellow and then go over top with yellow eyeshadow. You can also add a yellow eyepencil or yellow eyeshadow in the inner rim of the eye.

Blend out around the eye with black shadow to add dimension and blend out any marks that may have gotten on the black paint.\


For the neck piece, draw in some interlocking feather shapes and with the same technique as the face, flick black paint up from the bottom of the feathers. Fill them in with a gray shadow and then LAYER MORE GRAY AND WHITE PAINT! (My camera died at this point and I was losing lighting due to torrential rain fall headed our way!)
Fluff up your hair and you are ready to be the Owl Queen.


Thank you so much for taking the time to check this little blog out! I hope you enjoyed! Let me know what you think in the comments below! Owl see you later! I just couldn't resist another one!
&> Chelcey
Where To Get It:
Beletto Studio Airbrush Makeup (Acrtica): http://tinyurl.com/qx9sftv
Urban Decay Primer Potion: http://tinyurl.com/o2bsdsx
NYX Jumbo Eyeshadow Pencil:http://tinyurl.com/cfvnosc
Water Activated Face Paint(Mehron): http://tinyurl.com/m96tvho
You could also use: http://tinyurl.com/ka76les
NYX Eyeshadow Singles: http://tinyurl.com/m7c7ju9
Inexpensive Detail Makeup Brushes: http://tinyurl.com/olekzub
No comments:
Post a Comment