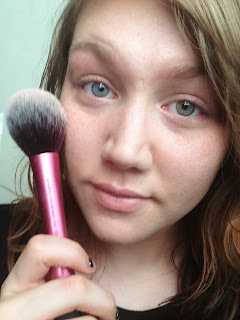
HELLO CHEEKBONES!
Ha well we can try at least right?
How?
I'll show you.
A little thing to remember when contouring and highlighting: Making parts of the face darker will make them recede and making parts of the face lighter and brighter will bring them forward! Just like a painting!
You can look at my Flawless Base blog to get your foundation ready if you like!
So where to begin..
Start with a contour color that suits you!
I'm just using a Cover Girl Face Powder in Classic tan.
I also like the Two Faced Chocolate Solie bronzer and the ELF Contour Kit bronzer for this step.
Key tip is to make sure that the color that you choose isn't too orange! No Oompa Loompa cheeks please.
Key tip is to make sure that the color that you choose isn't too orange! No Oompa Loompa cheeks please.
For the larger contours of my face I am using the Sigma F40 brush.
Now suck in those cheeks! I love how completely goofy I look here! haha.
Dip your brush into your powder and lightly sweep the brush in the hollows of your cheek making sure not to go too far past your pupil. Doing so can drag your face down and make you look older.
If your are worried about the dreaded double chin, sweep the brush directly under your chin and bring it down the sides of the neck so it blends seamlessly! No body wants to have their face not match their neck. NOT a sexy look!!
You can also sweep some powder along the hair line and the temples to reduce the look of the forehead.
Now if you aren't the biggest fan of your nose, you can contour that too!
I am using the Sigma E25 fluffy eyeshadow brush to sweep the contour powder in an up and down motion to slenderize the look of my nose. You can also darken the bridge of your nose, nostrils and ball of your nose to make them appear smaller! Makeup really is amazing and versatile.
Now add some blush! I'm using Frat Boy by The Balm and my Real Techniques Blush Brush.
Sweep this right above where you applied your contour. Once again not too close to the center of the face.
If you're worried about harshness or maybe you just applied to much, all you have to do is sweep a fluffy powder brush across your face to blend everything out.
For my highlight I have my favorite Cream Color Base by MAC in Hush.
It has a pretty very pale shimmery(NO GLITTER) pink tone to it.
Tap your ring finger in lightly. (Excuse the nail polish. Gross I know.)
Now place in strategic places that you want the light to catch and make stand out.
I placed it on my cheek bones, down the center of my nose, on the inner corner of my eyes, and on my cupids bow(right above the lip but not in the indent)
Now is the time to add a setting spray if you like them. I like the Skindinavia No More Shine spray but there are so many of these guys on the market! Urban Decay, Mac and even ELF!
AND YOU'RE DONE!!
I took two pictures in different lighting so you could see how everything looks where ever you may be going!
Indoor lighting
And where I think all makeup looks best, Natural sun light
Very natural and pretty!
Thanks for reading.
Like usual I hope this helps SOMEONE!
&> Chelcey


No comments:
Post a Comment